Maybe the name of the hat is a work in progress. Maybe not...
**LINK TO RAVELRY PAGE**
Yarn- Worsted weight
Needles- US4 for ribbing US8 for rest of hat circulars or dpns
Gauge- 4 sts per inch on larger needle
This is a loosey goosey recipe you can pick out your own colours and stripe pattern etc
Pattern
Cast on 84 stitches
Put a marker at beginning of round. Making sure your stitches aren't twisted. k2P2 around
Continue around for desired length of ribbing
Switch to larger needles
Knit round and round until piece measures 7 inches from cast on edge
Decrease round - K12, k2tog around 6 times (place a removeable marker somewhere to note decrease round for measuring ease)
Knit round 2 inches
Decrease round - K11, k2tog around 6 times (place marker somewhere)
Knit round 2.25 inches
Decrease round - K10, k2tog around 6 times (pm)
Knit round 2.25 inches
Decrease round - K9, k2tog around 6 times (pm)
Knit round 2.25 inches
Decrease round - K8, k2tog around 6 times (pm)
Knit round 2.25 inches
Decrease round - K7, k2tog around 6 times (pm)
Knit round 2 inches
Decrease round - K6, k2tog around 6 times (pm)
Knit round 16.5 inches This is where you can add or decrease the length of your SCAT
Decrease round - K5, k2tog around 6 times (pm)
Knit round 1 inch
Decrease round - K4, k2tog around 6 times (pm)
Knit round 1.5 inch
Decrease round - K3, k2tog around 6 times (pm)
Knit round 1.25 inch
Decrease round - K2, k2tog around 6 times (pm)
Knit round .75 inch
Decrease round - K1, k2tog around 6 times (pm)
Knit round .5 inch
Decrease round - K2tog around 6 times
Cut yarn and weave ends through stitches on needles. Weave in all ends. Make a pom pom!
A collection of some of the things that I have knit that I thought I would share with the world. Not necessarily full patterns but a good recipe to help you make your own fantastic creations! I will add in notes on different ways that the pattern could be altered for your own tastes. PLEASE feel free to ask any questions that you might have I am here to help!
Monday, October 21, 2019
Monday, January 7, 2019
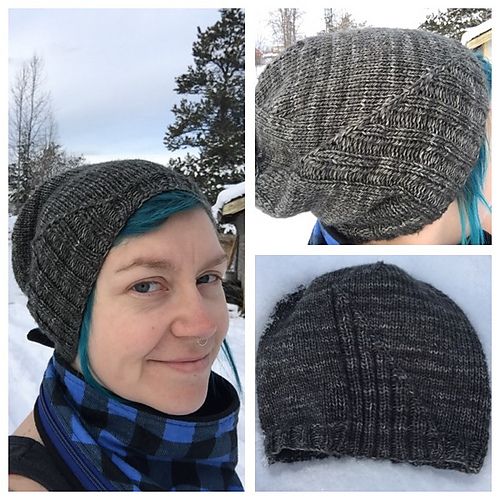
Mountain Pattern
MOUNTAINS
Yarn- worsted weightNeedles- 4US and 7US circulars or dpns
Gauge- 4.5 stitches per inch
Size- Average
FIRST NOTE-- Here is where depending on yarn weight/head size you can adjust stitches to make it work. Just increase or decrease stitches in sets of 4 (for ribbing) if you want to get extra fancy add or subtract stitches by sets of 4 and 6 (for decreases later on)
On smaller needles cast on 96 stitches
Join in round making sure not to twist stitches
k1 *p2, k2* repeating these 4 stitches until 1 stitch left k1
Continue in pattern for 1.5 inches
Switch to larger needles
For the most basic of mountain hats I divided my 96 stitches by 4 giving me 24 stitches per peak. Here is when you decide what size of peaks you want. The decreases are formed out of the knit columns
Decrease round-*SSK, follow in rib pattern for 20 stitches, k2tog* repeat 3 times
Increase round- *m1R, k1, follow in rib pattern for 20 stitches, k1, m1L* repeat 3 times
Ok so that's the whole idea of the pattern. One round of decreases and the next follow with increases
If you have chosen to do different sizes of peaks just read your knitting as you go basically just turning the rest of the hat stockinette that is not in the ribbed mountain peaks. Look at all the pictures and it should all make sense

Increase round- *k1, SSK, follow in rib pattern until 1 stitch before your last mountain edge, k2tog, k1* repeat 3 times
Decrease round- *k1, m1R, follow in rib pattern knitting the the last stitch of the mountain ridge, m1L* repeat 3 times
Are you getting the idea of it? Each round the ridge line shifts over until the connect and then it is all stockinette from there!
Basically you just continue around and around and when you have 2 stitches left of the peaks you k2tog of each. For the increase round you kfb of each mountain peak bringing you back to 96 stitches.
This will for 4 ribbed mountain peaks
To get the smaller peaks like in the photo below you chose when you want your ridge to start and when you are on a decrease round you just start another mountain by ssk and k2tog on either side of the peaks. Look at photos and they should make it more clear
Just remember on you increase rounds to increase on either side of those new ridges.
The next few photos show a couple different variations I have done
So after your peaks are all done you are just knitting round and round until the hat is as fitted or slouchy as you like it. I knit mine for 7 inches from bottom of ribbing
I usually always use a number of stitches divisible by 6 for my decreases. I find it just looks best. But you do you. Especially if you have adjusted your stitch count
My decrease formula is basically
- k14, k2tog* repeated 5 more times
- plain knit round
- *k13, k2tog* repeat til marker
- plain round
Continue doing your decrease round and one knit round until there is 7 stitches between decreases. This is usually where i start decreasing every round until 6 stitches left
Making sure to switch to dpns or longer cord for magic loop
Cut yarn and weave through 6 stitches and tie it off
OK folks I know this is a little vague but I promise it all makes sense once you start going
Please contact me on instagram I am garrry___ or garrry on ravelry for help!!
Monday, January 16, 2017
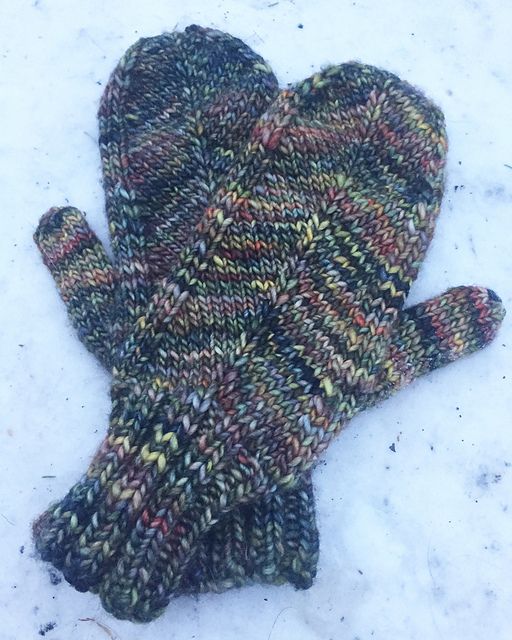
Slantways... The Mittening
***Link to Ravelry Pattern Page***
Yarn- I used Malabrigo Mecha which is classified as a bulky weight yarn. I used it more as an aran weight I think. One whole skein used 130yards
Needles- US6 and US8 circular needles or DPNS
Gauge- 4.5 stitches per inch on larger needles
Size- Women's medium
Pattern
- Cast on 32sts on smaller needles (I put 16 stitches on each needle while using the magic loop method)
- K2p2 for 2.5 inches making sure to not twist edge when joining to knit in round
Switch to larger needles
-Knit one round
-Knit 1, m1L, knit 7, m1R, knit 7, m1R, knit 1(needle 1)
(needle 2) Knit 1, m1L, knit 14, m1R, knit 1
-Knit round
-Knit 1, ssk, knit 6, m1R, knit 1, m1L, knit6, k2tog, knit 1 (needle 1)
(needle 2) knit rest of round
-Knit round
-Knit 1, ssk, knit 6, m1R, knit 1, m1L, knit6, k2tog, knit 1 (needle 1)
(needle 2) knit rest of round
-Knit round
-Knit 1, ssk, knit 6, m1R, knit 1, m1L, knit6, k2tog, knit 1 (needle 1)
(needle 2) knit 2, pm (start thumb) m1L, knit1, M1R, pm, knit rest of round
-Continue doing Slantways pattern (inc/dec round followed by 1 knit round) and thumb increases until you have 11 thumb stitches total between the markers on the inc/dec round
-Knit round
-Inc/dec round removing thumb stitches and putting them on a holder, cast on 1 stitch continue knitting round
-Continue in pattern until piece measures 9 inches finishing on a knit round
-K1, sssk, k5, m1R, k1, m1L, k5, k3tog, k2, ssk, k12, k2tog, k1
-Knit round
-K1, sssk, k4, m1R, k1, m1L, k4, k3tog, k2, ssk, k10, k2tog, k1
-K1, ssk, k9, k2tog, k2, ssk, k8, k2tog, k1
-K1, sssk, k2, m1R, k1, m1L, k2, k3tog, k2, ssk, k6, k2tog, k1
-K1, ssk, k5, k2tog, k2, ssk, k4, k2tog, k1
-K1, sssk, k1, k3tog, k2, ssk, k2tog, k2tog, k1 (10sts remain)
Kitchener st up
Repeat a second time changing the thumb placement to 3 sts from left side of second needle m1L, k1, m1R, knit 2 sts
Thumb
-Pick up 11 sts
-Knit 1 round picking up 1 stitch at end of round
-Knit 14 rounds
-K1, k2tog around
-K2tog around
-Cut yarn and pull through remaining stitches
weave in ends
Monday, December 26, 2016
Sweet Baby Angle
***Link to Ravelry Pattern Page***
Materials
US 4 circulars/ dpns
US 7 circulars/ dpns I switched to a long cord for magic loop when necessary
Yarn
Worsted Weight
Pattern
- Cast on 96 stitches
- Put marker and make sure stitches aren't twisted
- Knit 2, Purl 2 around until marker
- Continue for 1 inch
- Switch to larger needles
- Knit 2 Purl 2 for 24 stitches, put marker, knit around until marker
- * M1R, SSK, continue in ribbing pattern until marker, knit round
- (you will now be knitting the stitches to the right of the SSKs) Continue in ribbing pattern until marker, knit round *
- Continue the last 2 rounds from * to * (the M1R, SSKs will be moving one stitch over to the left every second round) until you SSK the last stitch before the marker, remove marker
- Knit every stitch round until hat measures desired length (mine was 7.5 inches)
- Begin decrease rounds Knit 14, K2tog around until marker
- Knit round
- Knit 13, K2tog around until marker
- Knit round
- Continue decreasing every second round until K7, K2tog around and then decrease every round until you K2tog around leaving 6 stitches
- Cut yarn and pull through final 6 stitches
Thursday, October 17, 2013
Slantways
*** Ravelry Project Page ***
Materials
- I used a little over 1 ball of Noro Kureyon for the pair (110 yards per ball)
So you will need at least that much of a worsted weight yarn for you main colour (MC)
--- For the pair with the ribbing in accent colour (AC) you will need only 1 ball of the Noro (or other worsted weight yarn) and another colour for the AC (unsure on yardage but not a lot)
I used Patons Classic Wool Merino
- 4us DPNs and 7us DPNs
- Stitch markers
Terms used in pattern
- DPNs -- double pointed needles
- Should have general knowledge about the increases m1L./ m1R as well as the decreases ssk/k2tog
- pm -- place marker
- slm -- slip marker
- k2p2 -- knit 2 purl 2 ribbing
Directions
- Using smaller needles cast on 36 sts with the MC (If doing the alternate version use the AC)
I set up my DPNs 9 stitches 18 stitches 9 stitches
- k2p2 ribbing for 7 rounds
Switch to larger needles (Switch to MC if you had been knitting first with the AC)
- Knit 18 stitches, place marker, m1R, place marker, knit 18 stitches
- Knit 1 round
- ** Knit 9, ssk, knit 7, m1R, slm, knit 1, slm, m1L, knit 7, k2tog, knit 9
- Knit 1 round **
- Repeat from ** to ** 15 more times
For the left hand
Starting the thumb
- Knit 6, pm, m1R, pm, knit 3, * ssk, knit 7, m1R, slm, knit 1, slm, m1L, knit 7, k2tog, knit 9 *
- Knit 1 round
- Knit 6, slm, m1L, knit 1, m1R, slm, knit 3, continue from * to *
- Knit 1 round
- Knit 6, slm, m1L, knit 3, m1R, slm, knit 3, continue from * to *
- Knit 1 round
- Continue increasing for the thumb in between the markers until there are 13 stitches, also continuing from * to * for the rest of the round
- Knit 1 round
- Knit 6 stitches, remove marker, slip 13 stitches onto scrap yarn, remove marker, knit 3, continue from * to *
- Knit 1 round
- Continue to follow pattern from ** to ** 2 more times (If you are following the pattern for the ribbing in AC then knit this last plain knit round in the AC so the ribbing looks better)
Switch to smaller needles
- k2p2 ribbing for 5 rounds
- Cast off loosely
For the right hand
Starting the thumb
- *Knit 9, ssk, knit 7, m1R, slm, knit 1, slm, m1L, knit 7, k2tog, * knit 3, pm, m1R, pm, knit 6
- Knit 1 round
- Continue from * to * knit 3, slm, m1L, knit 1, m1R, slm, knit 6
- Knit 1 round
- Continue from * to * knit 3, slm, m1L, knit 3, m1R, slm, knit 6
- Knit 1 round
- Continue increasing for the thumb in between the markers until there are 13 stitches, also continuing from
* to * as you go round
- Knit 1 round
- Knit 6 stitches, remove marker, slip 13 stitches onto scrap yarn, remove marker, knit 3, continue from
* to *
- Knit 1 round
- Continue to follow pattern from ** to ** 2 more times (If you are following the pattern for the ribbing in AC then knit this last plain knit round in the AC so the ribbing looks better)
Switch to smaller needles
- k2p2 ribbing for 5 rounds
- Cast off loosely
For both thumbs
- Pick up 13 stitches on larger needles and knit until 2 stitches from end of round k2tog (If you are following the pattern for the ribbing in AC then knit this knit round in the AC so the ribbing looks better)
- Switch to smaller needles and k2p2 ribbing for 4 rounds
- Cast off loosely
Wednesday, November 21, 2012
Bunny Ears
**Ravelry Pattern Page**
Materials
-Worsted weight yarn in desired rabbit colors. (I used Patons Canadiana)
-Double pointed needles in size 4US
-Yarn needle to sew up ears!
Directions
Outer ear-- Using 1 of your bunny colors
-cast on 32 sts (8sts on first,16sts on second, 8sts on third needle )
-join in round careful not to twist and knit 40 rounds
-knit 6 sts, k2tog, ssk, knit 12sts, k2tog, ssk, knit 6 sts
-knit 3 rounds
-knit 5 sts, k2tog, ssk, knit 10sts, k2tog, ssk, knit 5 sts
-knit 3 rounds
-knit 4 sts, k2tog, ssk, knit 8sts, k2tog, ssk, knit 4 sts
-knit 2 rounds
-continue the decrease rounds until 4 sts left on needles total. Cut yarn and weave through sts.
-bring yarn to inside of ear and tie off. No need to weave in because you are going to sew up the ear later
--Outer ear is done! Now do it again!
Inner Ear (new yarn color)
-cast on 12 sts (I just used 2 dpns knitting this portion flat)
-knit/purl for 35 rows
-ssk, knit 8, k2tog
-knit 2 rows
-ssk, knit 6, k2tog
-knit 2 rows
-ssk, knit 4, k2tog
-knit 1 row
-ssk, knit 2, k2tog
-knit 1 row
-ssk, k2tog
-cast off
--Inner ear is done! Now do it again!
Finishing
-Take the inner ear and lay it on the outer ear matching up the bottom rows. Sew in place using the yarn tails from the knitting of the inner ear.
-Do it again!
--Now attach to your toque, beenie, hat, headband, whatever!
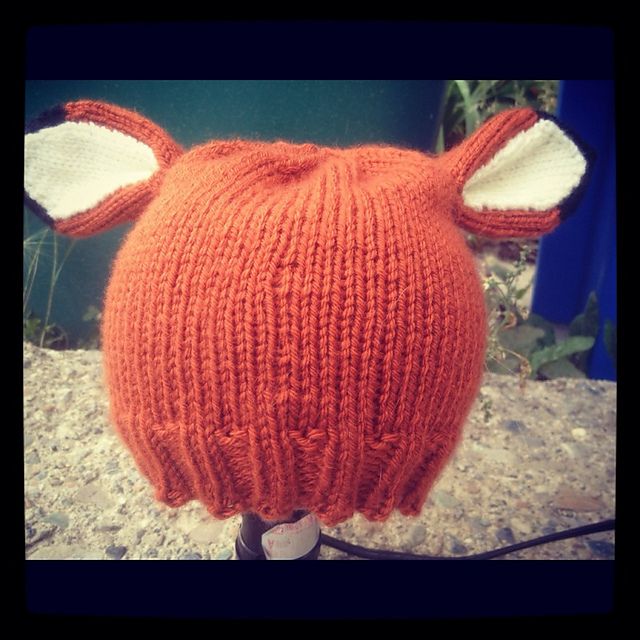
Fox Ears
Materials
-Worsted weight yarn in desired fox colors. Orange, black and white (I used Patons Canadiana)
-Double pointed needles in size 4US
-Yarn needle to sew up ear!
Directions
Outer Ear-- using the orange yarn
-cast on 32 sts (8sts first needle, 16sts second needle, 8sts third needle)
-knit for 20 rounds
-knit 6sts, k2tog, ssk, knit12 sts, k2tog, ssk, knit 6 sts
-change to black yarn and knit 3 rounds
-knit 5sts, k2tog, ssk, knit10 sts, k2tog, ssk, knit 5 sts
-knit 1 round
-knit 4sts, k2tog, ssk, knit8 sts, k2tog, ssk, knit 4 sts
-knit 1 round
-knit 3sts, k2tog, ssk, knit6 sts, k2tog, ssk, knit 3 sts
-knit 1 round
-knit 2sts, k2tog, ssk, knit4 sts, k2tog, ssk, knit 2 sts
-knit 1st, k2tog, ssk, knit2 sts, k2tog, ssk, knit 1 st
-k2tog, ssk, k2tog, ssk
--kind of a finicky next 2 rounds but decrease until 1 stitch left to pull yarn through and thread yarn to inside of ear and tie off. No need to weave in end since ear will be sewn shut!
---outside of ear done! Now make a second one!!
White Inside of Ear
-Cast on 11 sts (I just used 2 dpns for this, knit flat)
-Knit/purl for 18 rows
-ssk, knit across until 2 sts from end, k2tog
-purl row
-ssk, knit across until 2 sts from end, k2tog
-Purl row
-ssk, knit across until 2 sts from end, k2tog
--keep repeating the decreases until all sts are decreased and end pulled through last stitch
---Done! Now make another one!
Finishing
Take the white part and lay it on the outer ear part so the ends meet up on the bottom. Using the yarn ends from the white inner ear sew the white part onto the outer ear part (with the flat knit side out)
--- Do it again for the second ear!
Now attach to your toque, hat, beenie, head band, WHATEVER!
Wednesday, October 24, 2012
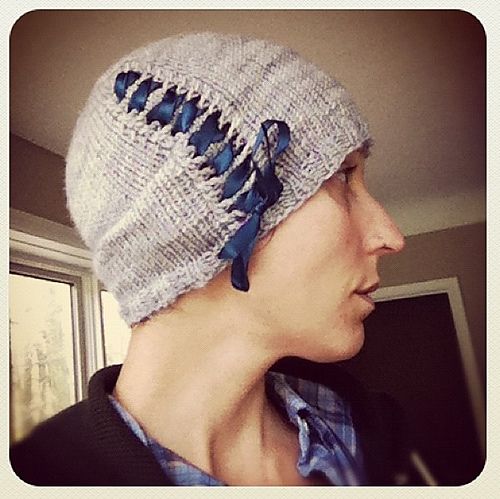
In a cinch!
Materials
- Worsted weight yarn (I used Madeline Tosh Merino in Silver Fox)
- circular needle/dpns 4us and 7us
- length of ribbon to lace through eyelets
Pattern
- On smaller needles cast on 84 sts and join in round without twisting placing a stitch marker to indicate start of round
- k2p2 ribbing for 5 rounds
- Change to larger needles and knit one round (no more purling)
-- eyelet round-- *knit 5 stitches, k2tog, yo, knit 3 sts, yo, ssk, finish knitting round
- Knit 2 rounds*
- Knit from * to * until hat measures 7 inches from cast on edge
- Knit --eyelet round--
-- decrease round-- Knit 12sts, k2tog, repeat around needle (make sure to change to magic loop method, 2 circulars or continue with dpns when necessary)
- Knit 1 round
- Knit --eyelet round-- (this will be the last eyelet round)
-- decrease round-- Knit 11sts, k2tog, repeat around needle
- Knit 1 round
-- decrease round-- Knit 10 sts, k2tog, repeat around needle
- Repeat these last 2 rounds knitting 1 less stitch each decrease round (next round is knit 9sts, k2tog, then 8, then 7 and so on) until there are 5 sts between each decrease and then decrease every round until there are 6 sts left on the needles
- Break yarn and weave through stitches.
- Weave in all ends
- Weave the ribbon through the eyelets and tie a pretty bow!
--- Depending on how many eyelets you make you might have to flub where the ends come through to tie the bow. You shouldn't be able to tell once the bow is tied! ---
****Errata-- decrease pattern changed***
Sunday, July 15, 2012
Easy Peasy Legwarmers
***Link to Ravelry Project Page***
Materials
-2 Skeins Bulky weight yarn 100g/3.5 oz (I used Bernat Alpaca Natural Blends)
-Size 7us and 9 us needles (circulars or dpns)
Gauge
- 4 stitches per inch on larger needles
Size
- My calf measures 15 inches around
Pattern
- On smaller needles cast on 44 stitches
- Join in round (careful not to twist) and do k2 p2 ribbing for 4 inches
- Switch to larger needles and knit every stitch and round for a total of 12 inches from cast on edge
- Switch back to smaller needles and knit 4 more inches of 2 by 2 ribbing
- Cast off loosely
- Weave in all ends
Tuesday, July 10, 2012
Butt-On Toque
***Link to Ravelry Project Page***
Materials
-DK weight yarn (I used Madeline Tosh Merino DK in Grasshopper)
-US 7 circs/dpns
-Stitch markers to mark beginning of round and decrease points
-1 RAD button!
Pattern
- Cast on 84 sts and join in the round with out twisting. Put a marker to indicate start of round
- Knit every round until the hat is nice and slouchy (mine was approx 8 inches with the edge rolled)
- Knit 14 sts, place marker. Repeat across round for decrease points
- Begin decreases-- k12, k2tog, repeat across the round
- Knit 2 rounds
- K11, k2tog, repeat across the round
- Knit 2 rounds
- K10, k2tog, repeat across the round
- Knit 1 round
- Knit9, k2tog, repeat across the round
- Knit round
- Repeat until you k2tog across the round and cut a tail and sew it through the remaining stitches…
- Get a rad button and sew it on with a bit of the hat gathered under it
- Weave in all the ends and DONE!
Tuesday, March 13, 2012
Ribbed for MY Pleasure
*** Link To Ravelry Project Page***Materials
- Worsted weight yarn
- US 4 circs/ DPNs
- US 7 circs/ DPNs
- Stitch marker for beginning of round and to mark where decreases go (if needed)
Pattern
- Cast on 90 sts
- Join in round (being careful not to twist) Put a marker at beginning of round and Knit for 1.5 inches
- Purl row (will act as the edge once the knitting is folded under for the "hemmed" edge)
- Knit 14 rounds
- On 15th round pick up cast on edge and knit it together with this next round (you could do a provisional cast on to start with instead of picking up the stitches)
- Change to US 7 needles and Knit 3 rounds
- Purl round
- Knit 1 round
- *Knit 9sts, m1* repeat the increases to marker (100 sts on needle)
- Knit 6 rounds
- Purl round
- Knit 1 round
- *Knit 10 sts, m1* repeat increases to marker (110 sts on needle)
- Knit 6 rounds
- Purl round
- Knit 1 round
- *Knit 11 sts, m1* repeat increases to marker (120 sts on needle)
- Knit 6 rounds
- Purl 1 round
- Knit 8 rounds
- Purl round
- Knit 8 rounds
- Purl 1 round
- Knit 1 round
- *Knit 10 sts, k2tog* repeat decreases to marker (110 sts)
- Knit 3 rounds
- *Knit 9 sts, k2tog* repeat decreases to marker (100 sts)
- Knit 2 rounds
- *Knit 8 sts, k2tog* repeat decreases to marker (90 sts)
- Purl round
- Knit 1 round
- *Knit 7 sts, k2tog* repeat decreases to marker (80 sts)
- Knit 3 rounds
- *Knit 6 sts, k2tog* repeat decreases to marker (70 sts)
- Knit 2 rounds
- Purl round
- *Knit 5 sts, k2tog* repeat decreases to marker (60 sts)
- Knit 2 rounds
- *Knit 4 sts, k2tog* repeat decreases to marker (50 sts)
- Knit 2 rounds
- *Knit 3 sts, k2tog* repeat decreases to marker (40 sts)
- Knit 1 round
- Purl round
- *Knit 2, k2tog* repeat to marker (30 sts)
- Knit 1 round
- *Knit 1, k2tog* repeat to marker (20 sts)
- K2tog across round
- Break yarn and pull through remaining sts
- Weave in ends
Saturday, March 3, 2012
Noro Striped Scarf of AWESOMENESS! Alternate Pattern

***Link To Ravelry Project Page***------ This is pretty much the exact same basic pattern as the Noro Striped Scarf of AWESOMENESS! The changes that I made for this one include doing a couple more increases on the neck edge. This will make the neck edge get a little longer, a little quicker. I like the idea of that so it will be easier to wrap around the neck, with out having so much fabric in the front. The changes will be made in PURPLE through out the pattern.
Yarn- 2 balls of Noro Kureyon Sock or Noro Silk Garden Sock in 2 different colorways
--- You can sub in an alternate yarn in the same weight or use what you want but adjust the needle size to work with your yarn weight.
Needles- US4 circular with a long cord so the stitches are not all jammed together
Notions- Stitch markers, yarn needle
Skills Needed- Cast on, Picking up stitches, Make1L increase (m1L), Make1Right increase (m1R), Yarn over, Cast off
-M1L on the purl side
-M1R on the purl side (MY instructions for this will be at bottom of pattern)
--This pattern is knit in stocking knit stitch, so knitting and purling alternate rows
Pattern-
-- Start by making a garter tab--
- Cast on 3 stitches in colorway number one.
- Knit 5 rows in garter stitch.
- Knit those 3 stitches, then pick up 3 stitches from the side of the knitting and then 3 stitches from the cast on edge (9 stitches on needle)
-Wrong side of scarf/set up row- K2, P2, pm (place marker), P1, pm, P2, K2
- Right side of scarf- *K2, m1L, K2, m1R, sm (slip marker), slip stitch, sm, m1L, K2, M1R, K2
- K2, P4, sm, P1, sm, P4, K2*
-Repeat from * to * for as many rows as you would like of the first colorway. You can do a few or a bunch, it is totally up to you!
---When you want to bring in the new colorway start on a right side row leaving the first colorway yarn dangling start knitting with the new one, following the pattern from * to * the same as before. ALTERNATE PATTERN- after the first K2 stitches on the WRONG SIDE rows do a M1L (but purling the stitch not knitting) Continue to purl across row until you are at the last 2 knit stitches. M1R (but purling not knitting), K2 last stitches. So for the alternate pattern you will be increasing on BOTH SIDES (right and wrong) of the scarf on ONLY the SECOND COLOR rows. You can continue to do the increasing on just the right side rows while using the first colorway. If you want to do the purl bump row while using the second colorway just so regular M1L and M1R's on both right side and wrong side of scarf. Knit those 2 rows in pattern then drop that yarn and pick back up the first colorway. PLEASE make sure to carry the yarn up the side LOOSELY so that edge does not pull in!!!
----A trick that I used to keep it loose was, in between those first 2 KNIT stitches of every row do a yarn over. When you get to that spot on the next row DO NOT KNIT THE YARN OVER just drop it. The extra yarn will just make those edge stitches looser. It works like a dream. I do it on both sides just so it is easier for me to keep in that pattern.
---The stitch in between the markers gets slipped every right side row and purled on the wrong side rows. This gives a wicked column running up the center of your scarf.

----The purl bumps are made by knitting a row on the "wrong side" instead of purling it. I did mine randomly when I felt like it or if I really loved the color that I was knitting. Have some fun with it! Show that yarn off!
- Keep knitting in pattern switching yarns every 2 rows until your scarf is big enough for your liking. Try it on (on scrap yarn if your circular needles are not big enough) and see if you like how long the "neck edge" is, if it wraps enough around. If yes then start on border, if not then keep knitting!
--Border--
I prefer the look of a solid garter stitch border. It gives a nice solid edge to the scarf and best of all, when knit long enough it keeps the edge from curling. Feel free to substitute in any sort of edging you like. Make it your own!
- Using only 1 colorway now (you can cut the other yarn off leaving a nice tail to weave in) keeping with the increase pattern in between the * to * knit BOTH rows until your border is as wide as you want it. Mine are about 2- 3 inches wide. I also like to continue to do the center slipped stitch through out the border.
-CAST OFF LOOSELY!
- Weave in ends and you are done!
--- Instructions for M1L/R while purling---
If you do not already know how to do M1L/R follow the "increases" link on the right hand side of the blog to knittinghelp.com.
M1L---- Lift the bar as you usually would for a M1R, purl into the FRONT of the stitch
M1R---- Lift the bar as you usually would for a M1L, purl into the BACK of the stitch. This can be a little tricky and I usually use my fingers to help push the yarn and needles around to do what I want them to do! PLEASE NOTE that this is how I do it, and if it doesn't seem right them definitely do whatever increases you are comfortable with. I think it looks good and seems to work for me. GOOD LUCK!
Friday, March 2, 2012
Noro Striped Scarf of AWESOMENESS!

***Link To Ravelry Project Page***Yarn- 2 balls of Noro Kureyon Sock or Noro Silk Garden Sock in 2 different colorways
--- You can sub in an alternate yarn in the same weight or use what you want but adjust the needle size to work with your yarn weight.
Needles- US4 circular with a long cord so the stitches are not all jammed together
Notions- Stitch markers, yarn needle
Skills Needed- Cast on, Picking up stitches, Make1L increase (m1L), Make1Right increase (m1R), Yarn over, Cast off
--This pattern is knit in stocking knit stitch, so knitting and purling alternate rows
Pattern-
-- Start by making a garter tab--
- Cast on 3 stitches in colorway number one.
- Knit 5 rows in garter stitch.
- Knit those 3 stitches, then pick up 3 stitches from the side of the knitting and then 3 stitches from the cast on edge (9 stitches on needle)
-Wrong side of scarf/set up row- K2, P2, pm (place marker), P1, pm, P2, K2
- Right side of scarf- *K2, m1L, K2, m1R, sm (slip marker), slip stitch, sm, m1L, K2, M1R, K2
- K2, P4, sm, P1, sm, P4, K2*
-Repeat from * to * for as many rows as you would like of the first colorway. You can do a few or a bunch, it is totally up to you!
---When you want to bring in the new colorway start on a right side row leaving the first colorway yarn dangling start knitting with the new one, following the pattern from * to * the same as before. Knit those 2 rows in pattern then drop that yarn and pick back up the first colorway. PLEASE make sure to carry the yarn up the side LOOSELY so that edge does not pull in!!!
----A trick that I used to keep it loose was, in between those first 2 KNIT stitches of every row do a yarn over. When you get to that spot on the next row DO NOT KNIT THE YARN OVER just drop it. The extra yarn will just make those edge stitches looser. It works like a dream. I do it on both sides just so it is easier for me to keep in that pattern.
---The stitch in between the markers gets slipped every right side row and purled on the wrong side rows. This gives a wicked column running up the center of your scarf.
----The purl bumps are made by knitting a row on the "wrong side" instead of purling it. I did mine randomly when I felt like it or if I really loved the color that I was knitting. Have some fun with it! Show that yarn off!- Keep knitting in pattern switching yarns every 2 rows until your scarf is big enough for your liking. Try it on (on scrap yarn if your circular needles are not big enough) and see if you like how long the "neck edge" is, if it wraps enough around. If yes then start on border, if not then keep knitting!
--Border--
I prefer the look of a solid garter stitch border. It gives a nice solid edge to the scarf and best of all, when knit long enough it keeps the edge from curling. Feel free to substitute in any sort of edging you like. Make it your own!
- Using only 1 colorway now (you can cut the other yarn off leaving a nice tail to weave in) keeping with the increase pattern in between the * to * knit BOTH rows until your border is as wide as you want it. Mine are about 2- 3 inches wide. I also like to continue to do the center slipped stitch through out the border.
-CAST OFF LOOSELY!
- Weave in ends and you are done!
Long Noro Armwarmers with Lace Detail
I still have yet to revise this pattern but I thought I could at least leave the link to the original "pattern" that is on Craftster.***Long Noro Armwarmers***
***Ravelry Link To Pattern Page***
Diagon-Alley

No, this pattern has no relation to the little wizard man and his stories. I just LOVE that it is "diagonally" and this cowl's patterning is diagonal lace work. I knit these while traveling in Spain and I ended up giving all 3 away as gifts... before I got close ups or measurements. They work up beautifully and light. You will have to knit one to see!***Link To Ravelry Project Page***
--This yarn has beautiful drape and creates a beautiful decoration around the neck. You can also pull it up and wear it as a hair wrap.
Yarn- Garnstudio DROPS Alpaca, 1 ball per cowl.
Needles- 1 US4 circular/DPN's (circulars with a 16inch cord or if you have larger then magic loop will be needed)
Extra supplies- A yarn needle to weave in ends.
Pattern-
-Cast on 124 sts You do not even have to mark the beginning of the round because you just go and go and go until the yarn is up!
-K2, yarn over k2tog, knit 1 * yarn over knit 2 together knit 1 * repeat from * to * around and around and around and you will get the diagonal lacey kind of pattern.
- I knit until my yarn was almost out (leave at least 3 times the circumference of the cowl to use for the cast off)
- Cast off and weave in ends.
Here is a picture to show it used as a hair wrap as well as a closer look at the pattern. This one was knit out of some sock yarn I forget the name but the colorway was Jamaica!
Checkered Toque

*** Link To Ravelry Project Page****** Link To Craftster Project Page ***
----Project notes from other knitters---
People have stated that this hat has been turning out small for them. It is an easy solution to fix that. You can cast on more stitches (keeping with a number that is still divisible by 4 to still fit in the checkerboard pattern) Or when it says to increase stitches after the ribbing you could cast on more there as well (multiples of 4)
Just remember to not pull the yarns too tightly.
Yarn- Patons Classic Wool Merino (worsted weight) approx. 1/2 ball each color
--In the pattern mc will stand for main color and cc will be the contrast color. The ribbing will be worked in the main color
Needles- US 4 (3.5mm) circular needle and/or DPNS
US 7 (4.5mm) circular needles and/or DPNS
Gauge- 5 sts per inch
Other supplies needed- Yarn needle for weaving in ends and stitch markers to mark the beginning of the round as well as where to decrease.
Pattern
-Using the smaller needles cast on 84 stitches put marker (pm) at beginning of round.
-Being careful not to twist, join in the round and begin the ribbing K2 P2 for 1 inch.
-Next round change to bigger needles and increase 12 stitches evenly (after every 7 stitches). Knitting all stitches. --I used the m1 increase.
-This round bring in your contrast color *knit 2 stitches in cc, 2 in mc and continue the round knitting 2 stitches of each color being careful not to pull the carrying yarn too tight.
- Do a second round in the same k2 cc k2 mc
- This next round knit 2 mc then knit 2 cc* and continuing that around for this round and the next
-Follow these last 4 rows from * to * until the hat measures 6 inches from needle to bottom of ribbing.
-- Set up row for decreases-- Put marker (pm) after every 16 sts (keeping in pattern)
- Keep knitting with the checkered pattern but make sure to decrease (k2tog) before each marker every round up until there is 6 sts left on the needles. To get the solid lines forming the decrease spiral just choose the mc or the cc each time even if it doesn't keep with the checkered pattern.
- When those last 6 sts are on the needles cut the yarns and using the yarn needle thread the tail through the last few stitches pulling them in tight and then weaving in all of the ends.
Thursday, March 1, 2012
Noro Ribbed Toque

***Link To Ravelry Project Page***Materials
- 4.5mm/7us circular needle and/or a set of 4.5mm/7us DPNs
- 1 Ball of Noro Kureyon or Silk Garden (50gr/100metres) or another worsted weight yarn.
--->NOTE- This pattern cuts it real close with the one ball, but it can be done.
- Stitch markers
Directions
- Cast on 84 stitches onto the circular needle or the dpns. Be careful not to twist the stitches when joining in the round. Place a stitch marker at beginning of round if using circulars.
-K2P2 in the round until it measures 5.75 inches from bottom cast on edge to needle.
-Next round continue with the ribbing pattern but transferring the stitches to the dpns (if not using them already) putting a stitch marker after every 14 stitches.
-*Next round continue with the ribbed pattern and when you reach 2 stitches before each marker/end of needle K2tog.
-The next round is knit plain, no decreases*
-Repeat from * to * 3 times more.
-Starting on the next round decrease before every stitch marker every round until there are 2 stitches left on each needle.
-Take yarn needle and pull end through 6 remaining stitches and pull tight and the weave in your ends.
This hat will look small when it's done but since it is done in ribbing it stretches to form fit almost anyone's head. If it has to be bigger or smaller just increase or decrease the amount of stitches first cast on. Making sure that it is still divisible by 4 (for the ribbing) and make sure there can still be equal placement of the stitch markers. And you can also lengthen or shorten the "body" of the hat to accommodate larger or smaller heads.
--> I did some revisions (and spell checking!) on the old pattern. Please let me know if you have any questions or concerns.
Patons SWS Mittens


***Link to Ravelry Pattern Page***
Materials:
1 ball Patons SWS yarn
A set of 4, 4.5mm dpns
A set of 4, 5mm dpns
Some waste yarn
A yarn needle
Skills needed:
Knit and Purl
Make 1 (m1)
Knit 2 together (K2tog)
Working in the round on dpns or magic loop method (or 2 circulars)
Picking up stitches
Kitchener stitch
Gauge:
On 5mm needles my gauge was 4.5sts per inch
Size: This mitten was knit for my hands which measure 6.25 inches around wrist, 7 inches from tip of middle finger to the base of the palm.
Pattern:
The Mitten
-Cast on 28 stitches on 4.5 dpns. Separate them 7 stitches on first and third needle, 14 stitches on second needle.
-Knit 2 Purl 2 ribbing for 18 rows (approx 3 inches)
-Switch to 5mm needles and knit one round
-increase round- Knit 7sts, m1, knit 14 sts, m1, knit 7 stitches
--> Now that I am more experienced with knitting I would probably chose to do the appropriate LEFT and RIGHT leaning increases. But it's all up to you!
-Knit 2 rounds
--increase round-- Knit 8 sts, m1, Knit 14 sts, m1, knit 8 sts
-Knit 9 rows (approx 5 inches to bottom of ribbing)
---> For the next round chose the appropriate hand's thumb hole instructions
---Thumb hole round for left hand-- Knit 4 sts, put 4 sts on waste yarn, cast back on 4 sts, knit rest of round
---Thumb hole round for right hand-- Knit 24 sts (needles 1 and 2) put next 4 sts on waste yarn, cast back on 4 sts, knit last 4 sts of round
-Knit 22 rounds (approx 9 inches to bottom of ribbing)
--Decrease round-- Knit 6sts, K2tog, K2tog, Knit 12sts, K2tog, K2tog, Knit 6 sts
---> Again, now that I am more experienced I would use the appropriate left and right leaning decreases (links to a knitting help website with awesome instructions are on the right side of the blog)
-Knit 1 round (no decreases)
-Decrease round-- Knit 5 sts, K2tog, K2tog, Knit 11 sts, K2tog, K2tog, Knit 5 sts
-Decrease round-- Knit 4 sts, K2tog, K2tog, Knit 10 sts, K2tog, K2tog, Knit 4 sts
-Decrease round-- Knit 3 sts, K2tog, K2tog, Knit 9 sts, K2tog, K2tog, Knit 3 sts
-Decrease round-- Knit 2 sts, K2tog, K2tog, Knit 8 sts, K2tog, K2tog, Knit 2 sts
-Knit next 3 sts on needle 1 and move those stitches to needle 3 so you can do Kitchener stitch
- Finish stitching them up and weave in ends.
The Thumb
-Pick up the 4 stitches on waste yarn
-continue to pick up 7 more stitches from around the thumb hole (I had 4 sts on needles 1 and 2 and 3 sts on needle 3)
-Knit 10 rounds (or until your thumb is covered)
--Decrease round-- Knit 2 sts, K2tog, Knit 2 sts, K2tog, Knit last 3 sts
- Cut yarn leaving a good length of yarn to weave in through these sts and pull tight and then continue to weave in these yarn tails from making the thumb.
--> Repeat for second mitt using the opposite thumb hole instructions.
---> This pattern was written quite a while ago when I was just getting into knitting. Please ask if you have any questions.
Wednesday, February 29, 2012
Bell Shaped Legwarmers

*** Ravelry Link To Project Page***This pattern is knit flat and then seamed up the back. If you are using a different yarn it would be easily adapted for whatever gauge. They are bell shaped on the bottom so if you feel they are too big then decrease more. OR if you feel they aren't big enough, then cast on more!
Skills Needed- Cast on, Knit, Purl, K2tog, cast off
Materials- 6.5mm/ 10.5 us needles
- 2 balls Rosarios 4 Tentacao 100% wool made in Portugal
--- This pattern used the entire ball per leg. Not much room for extra so if you want bigger/longer I say get another ball to be safe.
The label says: 130m (142yrds) and its gauge is 14sts per 10cm across and 21 sts per 10cm up on a size 8mm /11us needle
This yarn is very thin to pretty thick so if you want to substitute check the ball band for some info maybe to match up some sort of a gauge.
- Also needed is some 1/4inch elastic or ribbon to keep them up and a yarn needle for seaming
Gauge- roughly 3sts per inch (remember its thick and thin making it harder to tell)
Pattern
-Cast on 45 stitches and knit in garter stitch for 1 inch
-Knit in stocking knit for 4.5 inches measured from bottom of needle to cast on edge
-K2tog at beginning and end of needle
-Knit 3 rows in stocking knit
-K2tog at beginning and end of needle
-Knit 3 rows in stocking knit
-K2tog at beginning and end of needle (39sts on needle)
---Now here's where you can make some adjustments. If your leg is thinner and you want it to bell more then do more decreases. If your leg is larger do less. Continue until they are the shape and size you would like
- Continue in stocking knit for 13 inches measured from bottom of needle to cast on edge
---If you need them longer or shorter adjust the length here.
- Start ribbing. Depending on if you made changes or not your numbers might be different. Do some simple math to figure out what will work for you. With my numbers I have 39 sts which is divisible by 3 so I could do K2 P1.
- Continue ribbing for 3 inches
- Cast off very loosely
- Seam up the back and then weave in elastic around the top. Or you could use ribbon!
---To convert this into knit in the round is very simple. You would have to use DPNs or magic loop method (or knitting with 2 circulars) Just be careful to not twist when joining in the round. You might have to use a stitch marker to mark the beginning of the round as well. But other then that it's just the same. Doing decreases on either side of the marker. You could do left and right slanting decreases to make it symmetrical or just K2togethers. It's up to you!
--- If you need help with the different increases/decreases there are some helpful links in the sidebar on the right side of the blog
Subscribe to:
Posts (Atom)